Table of Contents
Let us look at some of the basic functions that can be performed on Bills in Erpisto.
Create Bill #
To create a new bill in Erpisto:
- Go to Purchases > Bills (or press shift + b).
- Click the + New button in the top right corner of the page (or press c + b).
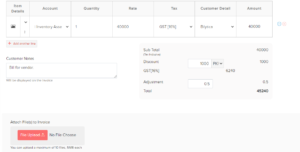
- Fill in the required details.
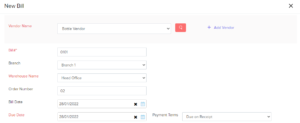
| Fields | Description |
|---|---|
| Vendor Name | Select the vendor whose bill you’re recording. |
| Bill# | Enter the unique bill number. |
| Order Number | Enter an order number for your bill. |
| Bill Date | Enter the date on which you create the bill. |
| Due Date | Enter the due date for bill payment. |
| Payment Terms | Choose the time limit in which you must pay your vendor. For example, Net 15 means that you must pay the vendor within 15 days after the bill’s creation date. The due date will be altered based on the payment term you choose. |
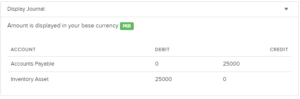
View Journal #
After you have recorded a bill, a corresponding journal will be created.
To view the journal:
- Go to Purchases > Bills.
- Select the desired bill.
- Scroll down and click Display Journal (or) click More > View Journal on the overview page.
Record Payments #
You can manually record payment for a bill. Here’s how:
- Go to Purchases > Bills.
- Select the bill for which you wish to record payment.
- Click the Record Payment button in the top right corner of the page.

- Fill in the required details.
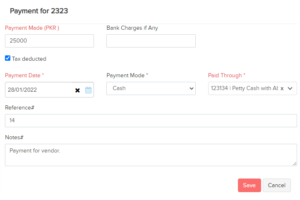
| Fields | Description |
|---|---|
| Payments Made | Enter the amount to pay the vendor. By default, the total amount is auto-populated. You can also choose to pay a part of the payment. |
| Tax Deducted | Mark this box if any tax is deducted while making payment to the vendor. Enter the Amount Withheld and the Tax Account, which tracks this tax. |
| Payment Date | Enter the date you make the bill payment. |
| Payment Mode | Choose from the different payment modes or configure one of your own. |
| Paid Through | Choose the account which tracks this payment. |
- Add Notes and Attach Files to the payment.
- Click Save


