Table of Contents
Items #
Items are the goods or services that you deal with in your business.
Whenever you create transactions for your customers or vendors, you can add these items, and their details will be auto-populated.
Create Item #
To create an item in Erpisto:
- Go to the Items module in the left sidebar and select Items.
- Click + New on the right side of the page.
- Enter the Type, Name and other details.

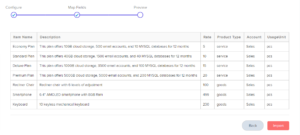
Sales Information
| Fields | Description |
|---|---|
| Rate | Rate at which you sell the item to your customers. This rate will reflect your sales transactions like invoices, sales orders, etc. |
| Account | The account is used to track sales of the item. |
| Description | Add notes related to sales of the item. |
Purchase Information
| Fields | Description |
|---|---|
| Rate | Rate at which you buy the item from your vendors. This rate will reflect your purchase transactions like bills, purchase orders, etc. |
| Account | The Cost of Goods Sold account is used for tracking the purchase made for items in Erpisto. |
| Description | Add notes related to purchases of the item. |
Import Items #
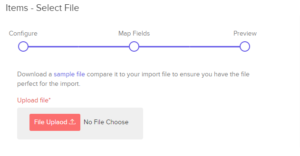
If you already have a list of items, you can import them into Erpisto in the CSV, TSV or XLS format.
To know the import format, i.e. the columns and data to be included in the import file, you can download the sample import file, which we’ll be looking at in the steps below.
- Go to the Items module and select Items.
- Click the Hamburger icon in the top right of the page.
- Select Import Items.
- Click the Choose File button under Upload file. You can download the sample file for your reference by clicking the sample file.
- Click Next.
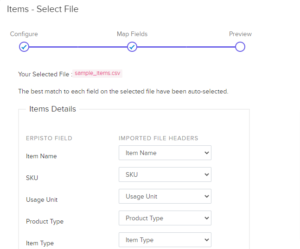
- Ensure that all the fields are mapped correctly on the Map Fields page.
- Click Next.
- In the Preview window, click Import.