There are a host of actions that you can perform upon an invoice in Erpisto.
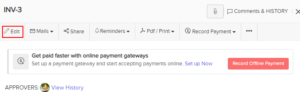
Edit Invoice #
To change details of an existing invoice:
- Go to Sales > Invoices and select the invoice whose details you want to edit.
- Click the Edit icon.
- Make the necessary changes and click Save.
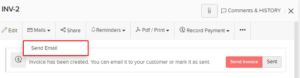
Send Invoice to Customer #
Usually, when you create an invoice, you would have saved it as a draft or sent it to your customer right away.
If you have saved it as a draft, you can send it to your customer manually. Here’s how:
- Go to Sales > Invoices and select the invoice you want to send.
- Click the Mail dropdown and select the way in which you want to send the invoice to the customer.
- Go through the template and click Send.
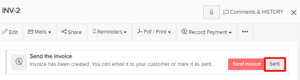
Mark Invoice as Sent #
You can manually mark an invoice as sent. This allows you to record payments for the invoice. To mark an invoice as sent:
- Go to Sales > Invoices.
- Select the invoice which is in the Draft status that you want to mark as sent.
- Select Sent.
If you have enabled Client Portal for the customer, they can view the invoice in their portal and perform actions
Share Invoice Link #
You can generate a link for an invoice in Erpisto and share it with your customers. Using this link, your customer can view and/or pay for that invoice.
To generate and share an invoice link:
- Go to Sales > Invoices.
- Select the invoice for which you want to share the link.
- Click Share.

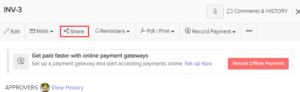
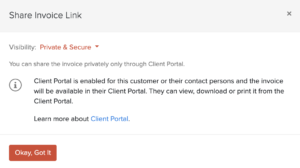
- You can generate the link for Public or Private & Secure access.
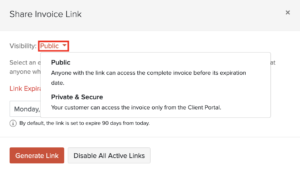
- If you have selected Public, click Generate Link.
- Copy the link URL and share it with your customer.

- If you have selected Private & Secure, your customer can view the invoice from their Client Portal.
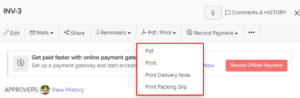
Print Invoice #
To print an invoice in Erpisto:
- Go to Sales > Invoices and select that which you want to print.
- Click the PDF/Print dropdown and select Print.
- Check the invoice preview and click Print.
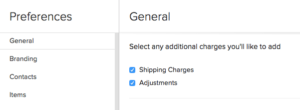
Additional Charges #
In Erpisto, you have the option to add two additional charges:
- Shipping Charges
- Adjustment
To configure these charges:
- Go to Settings > Preferences > General.
- Scroll down to Select additional charges you’ll like to add.
- Mark the box Shipping Charges and Adjustments as per your requirement.
- Click Save at the bottom of the page.
Now, you will find these fields in the transactions below the item table.

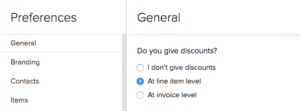
Discounts #
Discounts can be applied on two levels in Erpisto:
- Item level – Discount is applied individually on each item in a transaction.
- Invoice level – Discount is applied to the total amount of the invoice.
To configure the discount preferences in Erpisto:
- Go to Settings > Preferences > General.
- Scroll down to the Do you give discounts? section.
- Select At line item level for item-level discounts or At invoice level for invoice level discount.
- Select I don’t give discounts if you don’t wish to give discounts in any of your transactions.
- Click Save at the bottom of the page.
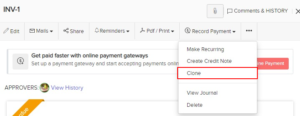
Clone Invoice #
If you want to create an invoice with the same details as an existing one, you can choose to clone it rather than create a new invoice. Here’s how:
- Go to Sales > Invoices and select the invoice to clone.
- Click ••• and select Clone.
- Make necessary changes to the New Invoice page.
- Click Save to create a new cloned invoice.
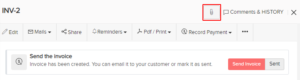
Attach Files To Invoice #
You can attach up to 5 files of 5MB each to an invoice. To attach files to an invoice:
- Go to Sales > Invoices and select the invoice for which you want to attach the file(s).
- Click Attach File(s) on the top right corner of the page.
- Select your upload option.
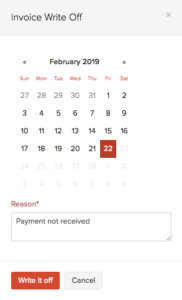
Write Off Invoice #
When your customer doesn’t pay you for an invoice and all attempts at making them pay has failed, you can write it off. The amount of the invoice that you write off will reflect on the Bad Debt account in the reports.
To write off an invoice:
- Go to Sales > Invoices.
- Select the invoice you want to write off.
- Click Record Payment > Write Off.
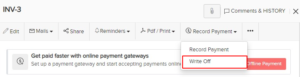
- Enter the Reason for the write-off.
- Click Write it off.
If you want to revert the write-off, click the Cancel Write Off button in the top right corner of the page.


