Table of Contents
Let us see the basic functions performed in the Purchase Order module in Erpisto.
Enable Purchase Orders #
You will have to enable the Purchase Order module to view and create purchase orders transactions in Erpisto. To do this:
- Go to Settings > Preferences.
- Select the General in the left menu.
- Mark the Purchase Order box.
- Click Save.

Create Purchase Order #
To create a new purchase order:
- Go to Purchases > Purchase Orders.
- Click the + New button in the top right corner of the page.
- Fill in the required details.
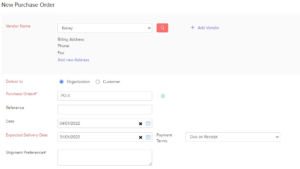
| Fields | Description |
|---|---|
| Vendor Name | Enter the name of the vendor for whom the purchase order is created. |
| Deliver To | Choose if you will create the purchase order for an Organization or a Customer. Select the address to which the items in the purchase order should be delivered. |
| Purchase Order# | Enter a unique number for your purchase order. |
| Expected Delivery Date | Select the Date on which the items are expected to be delivered. |
| Date | Select the Date on which the purchase order is created. |
| Shipment Preference | Enter the mode of shipment you prefer, i.e. Cargo, Air etc. |
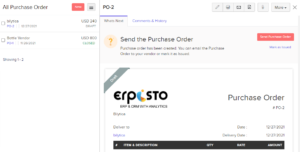
- Click Save as Draft or Save and Send.
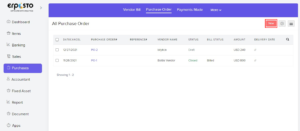
View Purchase Orders #
If you have already created purchase orders, you can view them in the Purchase Order module. Here’s how:
- Go to Purchases > Purchase Orders.
- Select the purchase order you wish to view.
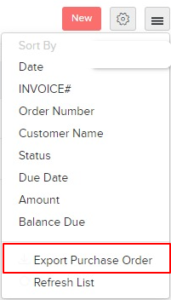
Export Purchase Orders #
You can export all your purchase orders in Erpisto in the CSV, XLSX or the XLS format. Here’s how:
- Go to Purchases > Purchase Orders.
- Click the Hamburger icon in the top right corner of the page.
- Select Export Purchase Orders.
- Select the export format under Export As, and fill in the other necessary fields. Click Export.